YOUR 40-COLOUR KIT

Make it yours.

A picture. A numbered pattern.
Private & free. No account.
Square rhinestone artwork examples

WALLFID / THE 40-COLOUR PATTERN MAKER

Your picture.
Your sparkle.

A photo, a flower, a little piece of you.
Turn it into a numbered pattern for your acrylic board — then bring it to life in rhinestones.

Free to use. No account. Photos stay on your device.

40colours.
all yours.
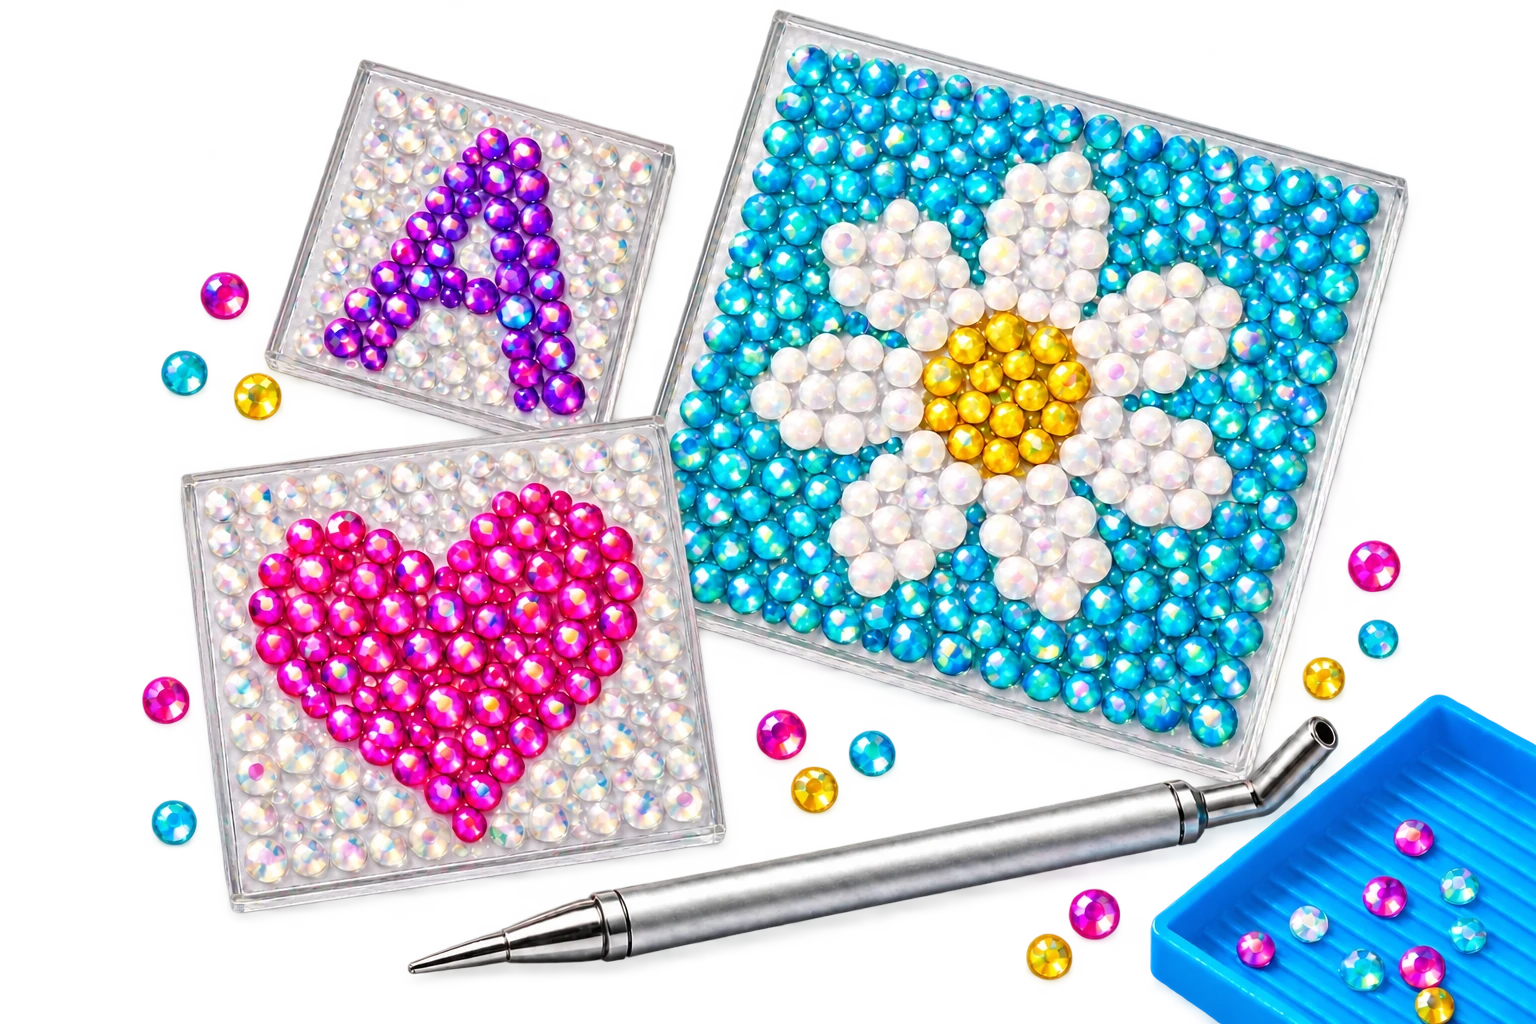
Illustrative square acrylic rhinestone mosaics with a daisy, pink heart and purple initial, alongside a silver picking pen and blue trayDIY effect concept · AI-generated
01 / CHOOSE YOUR BOARD02 / ADD YOUR PICTURE03 / MAKE IT YOURS

SMALL CANVAS. BIG PERSONALITY.

What will you make?

Try a starting point.
Or make something only you could.

Digital pattern examples. Your kit contains blank boards to decorate.

YOUR CREATIVE CORNER

Let’s make a pattern.

40 colours, numbered to match your box.
A clear guide from the first stone to the last.

02

Your pattern

Whole image kept. Empty edges need no stones.

100%
YOUR ACRYLIC CANVAS40-colour kit
80 × 80 mmACRYLIC BOARD
24 × 24Grid
576Stones needed
—Colours used / 40

Choose a number to find its stones in the pattern.

Small patterns simplify photo details. Try a larger custom size for more detail.

Digital rhinestone preview. Check colours and spacing against your physical kit.

A PICTURE. A PATTERN. A LITTLE PATIENCE.

The good part?
Making it yourself.

Print your pattern at 100%, check the scale,
and place it beneath your clear board.

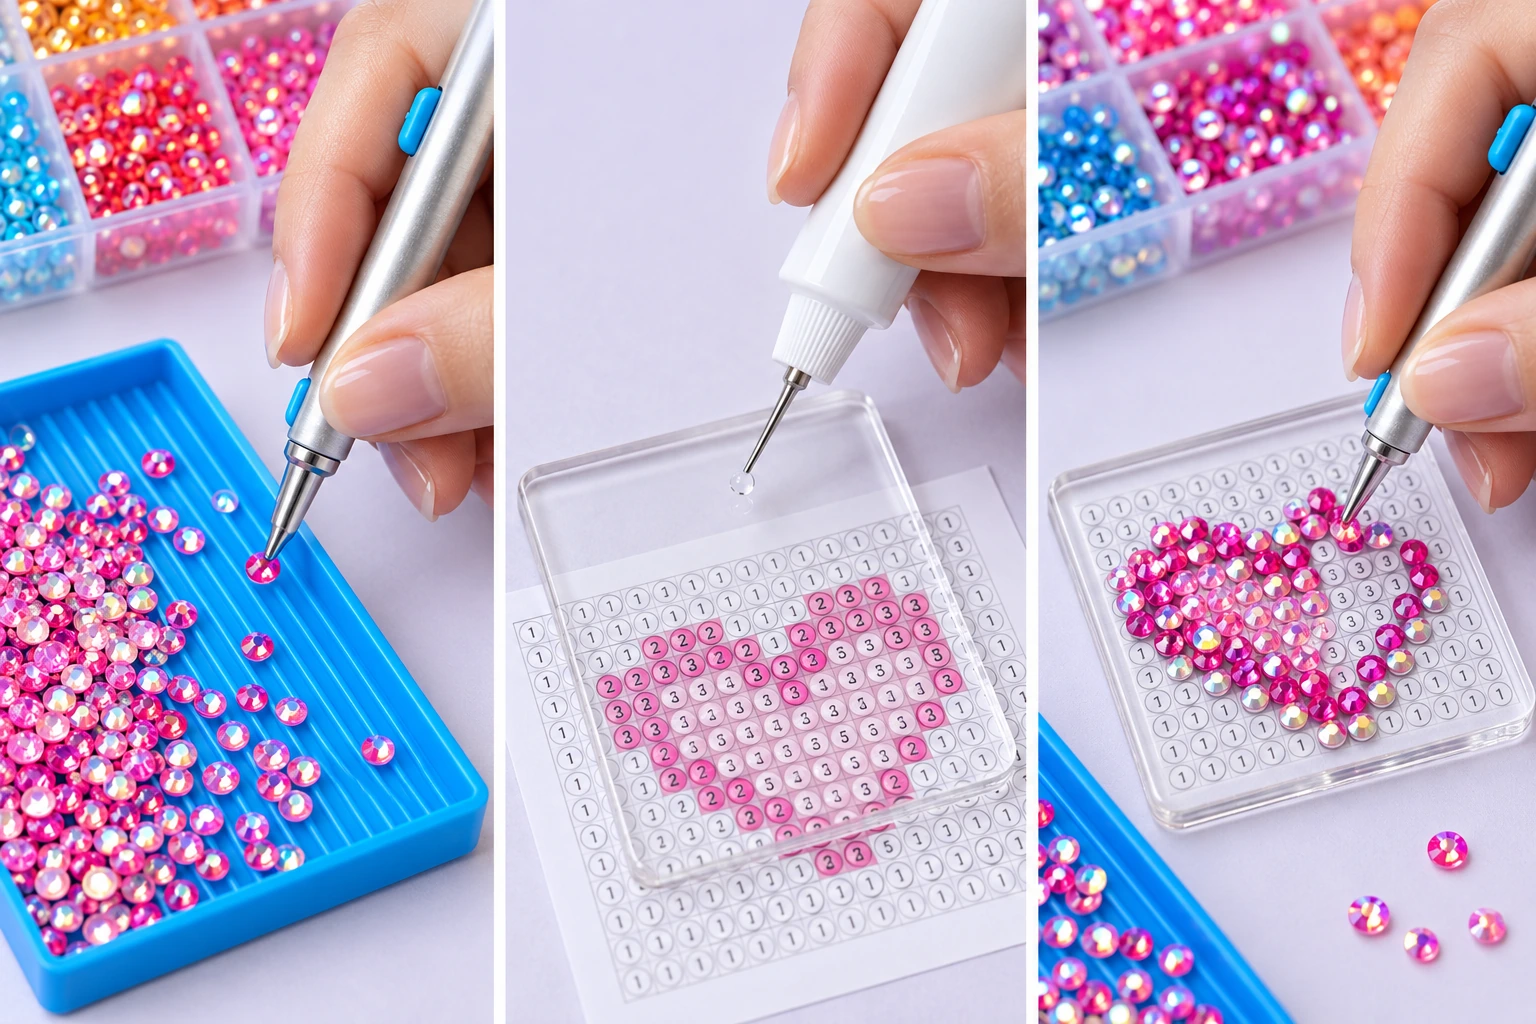
Illustration of a silver pen picking a pink rhinestone from a blue ridged tray
01

Find & pick

Find the numbered colour in your box. Use your tray and pen to pick up a stone.

Illustration of a small adhesive dot applied to clear acrylic above a paper guide
02

A little dot of glue

Apply a small amount to your board, following the adhesive instructions in your kit.

Illustration of a pink rhinestone being placed on a heart mosaic
03

Place & enjoy

Match the number, place the stone and press gently. Allow your adhesive to cure as directed.

AI-generated process illustrations. Use your downloaded pattern; the illustrated paper is not a placement template.

WALLFID / WORLDWIDE

Choose your language

Your picture and settings stay as they are.

MAKING GUIDE

From picture to piece.

  1. Choose the board from your kit. The 50 mm board suits simple motifs; 100 mm offers more detail.
  2. Add a clear image and frame your subject. Small patterns simplify photographs.
  3. Create the pattern. Choose Numbers to see the placement guide.
  4. Select a colour number to highlight it in the pattern and find its compartment. Number 1 starts at the top left, with 8 compartments in each row.
  5. Print at actual size / 100%, with headers and footers off. Measure the 50 mm scale line.
  6. Remove the protective film and secure the checked template beneath the board. Follow the kit’s adhesive and curing instructions.

This is a design preview. Photo-derived colours, spacing, corner shape and kit quantities still need to be checked with physical samples.

YOUR PATTERN

Ready to save

Check the numbers and quantities before saving.

Save to your device ↓

If saving does not start, open this site in your usual browser.